rope border tutorial
Posted: Thu Oct 27, 2011 5:16 pm
This Is about the shortest tutorial I will ever write, many will not find it useful because they cannnot/will not buy the required material, but I promised so here it is
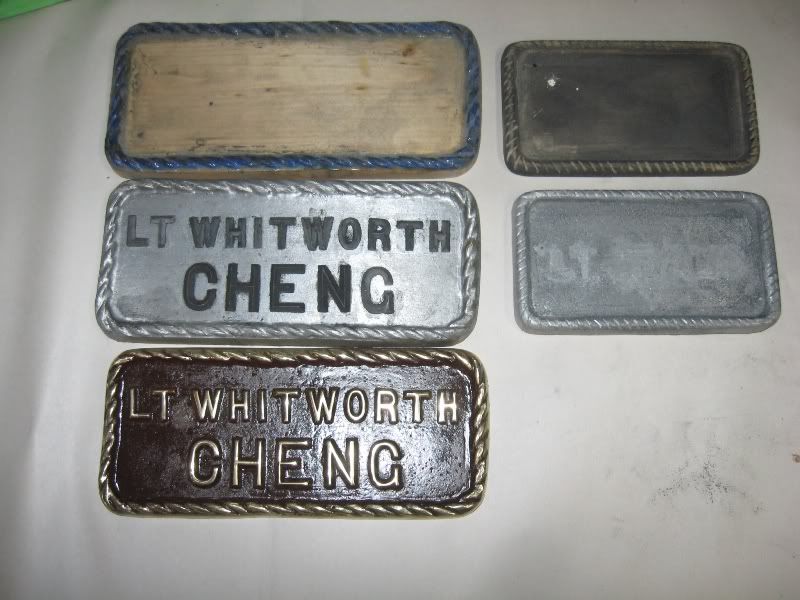
Rope borders are a nightmare, I have used real rope and waxed it in on the left, pretty good results, but an insane amount of work probably 20 hours for that 3 X 7 plaque, just the border. hand carving is even more time consuming, and results are a matter of skill and patience
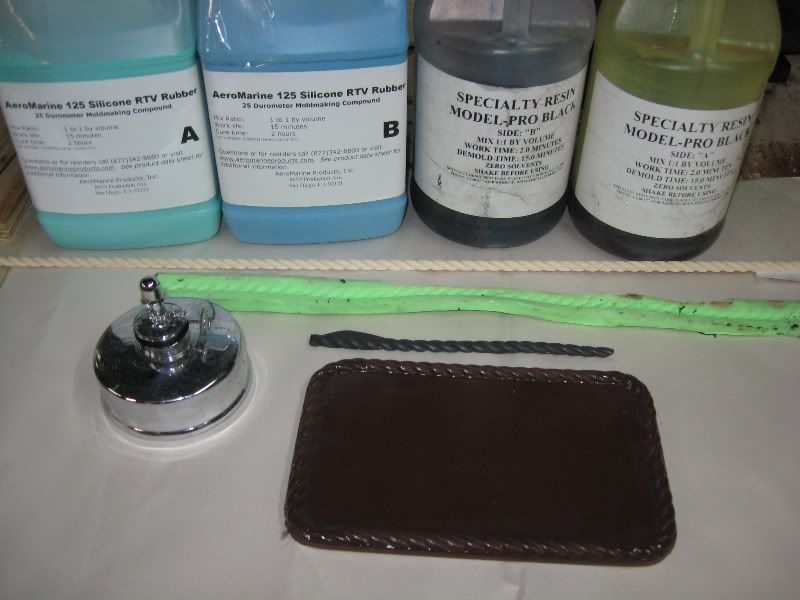
For near perfect results in the shortest time, purchase a piece of rope molding, try the craft stores for the smaller sizes, home centers may have it. you can order it here http://www.tapeease.com/rope_molding.htm But they are way too expensive, shop around on the internet, it is out there "wood rope molding or border" now make a silicone mold, I have my favorite Aeromarine product in the picture, but the green mold was actually made with silicone sealant and acrylic paint, when I was still experiimenting.. the aeromarine is so much better to work with, no smell at all, and it is a true liquad. and BTW if you compare the price of silicone to the price of the aeromarine product. the aeromarine is competative, It is an internet purchase also
Now the critical part, the specialty resin model pro is cast in the rubber mold. let it dry for at least 15 minutes. clean all the flashing off the piece, then using your alcohol lamp... You do have an alcohol lamp right? if not a candle should work. gently heat the cast plastic rope and bend it , hold it down onto a flat surface to get it flat, repeat til you get the bend you need.
do all your corners seperate, lay them out and glue them down. now break out all that left over wood molding, and cut pieces to length. diagonally through the low spots on the rope. if you get a big gap, cut the long section ito several pieces. on 1/4 or 3/8 you can cut the wood rope with a knife. divide the gap into several places, your cuts, so it is not noticable, glue everything down, touch up your cuts with some fillet wax.
There you go the fastest, and esiest way I have found to make perfect rope borders

Rope borders are a nightmare, I have used real rope and waxed it in on the left, pretty good results, but an insane amount of work probably 20 hours for that 3 X 7 plaque, just the border. hand carving is even more time consuming, and results are a matter of skill and patience
For near perfect results in the shortest time, purchase a piece of rope molding, try the craft stores for the smaller sizes, home centers may have it. you can order it here http://www.tapeease.com/rope_molding.htm But they are way too expensive, shop around on the internet, it is out there "wood rope molding or border" now make a silicone mold, I have my favorite Aeromarine product in the picture, but the green mold was actually made with silicone sealant and acrylic paint, when I was still experiimenting.. the aeromarine is so much better to work with, no smell at all, and it is a true liquad. and BTW if you compare the price of silicone to the price of the aeromarine product. the aeromarine is competative, It is an internet purchase also
Now the critical part, the specialty resin model pro is cast in the rubber mold. let it dry for at least 15 minutes. clean all the flashing off the piece, then using your alcohol lamp... You do have an alcohol lamp right? if not a candle should work. gently heat the cast plastic rope and bend it , hold it down onto a flat surface to get it flat, repeat til you get the bend you need.
do all your corners seperate, lay them out and glue them down. now break out all that left over wood molding, and cut pieces to length. diagonally through the low spots on the rope. if you get a big gap, cut the long section ito several pieces. on 1/4 or 3/8 you can cut the wood rope with a knife. divide the gap into several places, your cuts, so it is not noticable, glue everything down, touch up your cuts with some fillet wax.
There you go the fastest, and esiest way I have found to make perfect rope borders