Latz
Nice shell the one laying on top is walnut, the bottom looks like cherry but I don't think it is. anyway nice work.
I watched a youtube video that I guy did on making a small flat belt pattern so he could cast up a couple of pulleys to replace the one he screwed up and cracked, so I guess that makes me and expert (right, no, damn and I thought I was an expert) believe me I'm no expert of even mediocre wood worker, matter of fact I really don't like messing with it but somethings require it.
I cut all my pieces out the strips to cut the segments I used my neighbors table saw thats not the greatest. The segments I cut using a borrowed miter saw.
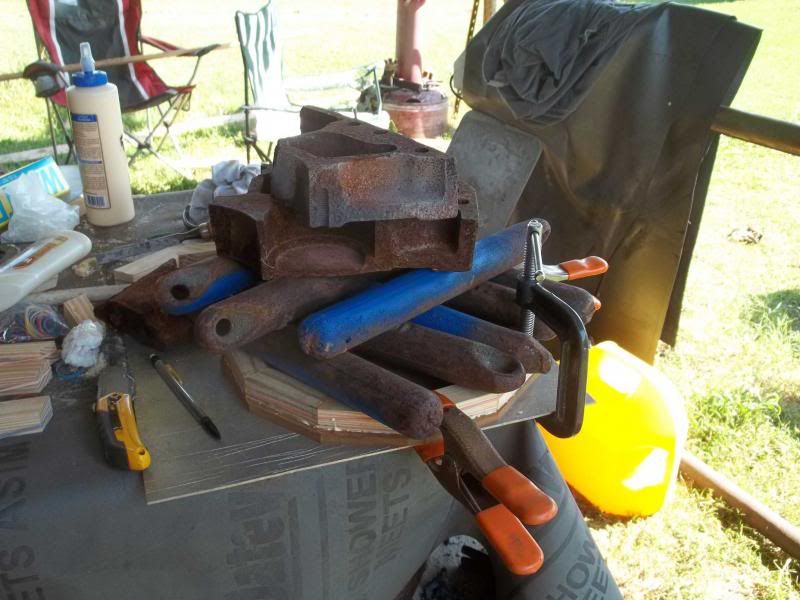
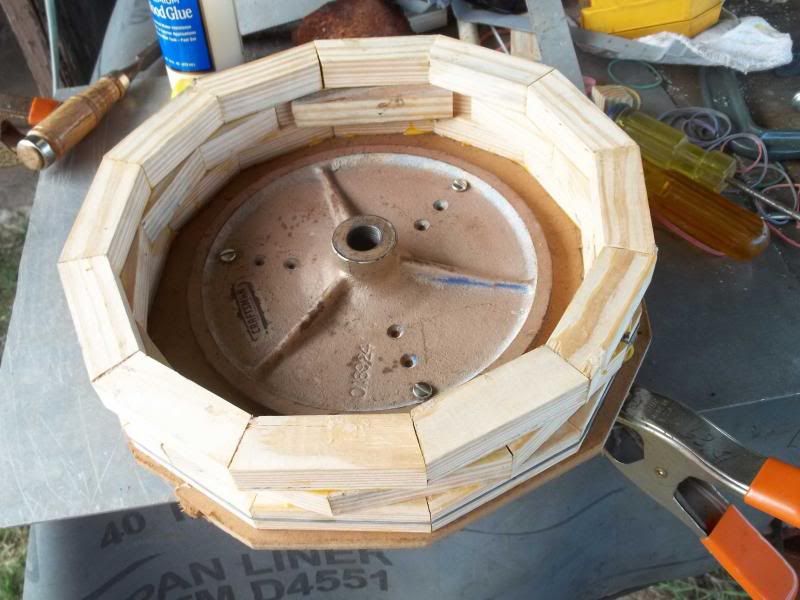
I paired them up holding them together with rubber bands then as you can see in the photo I started by gluing two segments together and laid another segment on top of that and clamped it down so as to hold it all in place, now I just have a lot more gluing to do.
OOH yea the real kicker it you see where I'm working in that photo on the little piece of aluminum laying on top of my muller, thats my build space for doing all this gluing.
DA
The problem I mentioned isn't going to happen according to the cad program I checked the layout with the 3/8 shell that I am after is suppose top fit in that even with the segments rotated.
you ever cast that brass drum that you were after, I take it that you got that big monarch wired and working or you still using it for a door stop?
Cincinnati Shaper
Re: Cincinnati Shaper
David and Charlie aka the shop monster
If life seems normal your not going fast enough" Mario Andrette
If life seems normal your not going fast enough" Mario Andrette
Re: Cincinnati Shaper
Hey Dallen, been following the build and went on ahead an registered here at Found Dreaming. It is always a headache to have cast iron back fire like that! I had 3 parts not turn out just this weekend!
On your nut, if I may suggest, you need a feeder to prevent the shrinkage. I would put one in that is the same size or larger than the actual part. I always make sure the feeder is taller than the part being fed. Have had great luck with that. See below a part that I cast and see the amount of shrinkage I had in the feeder.
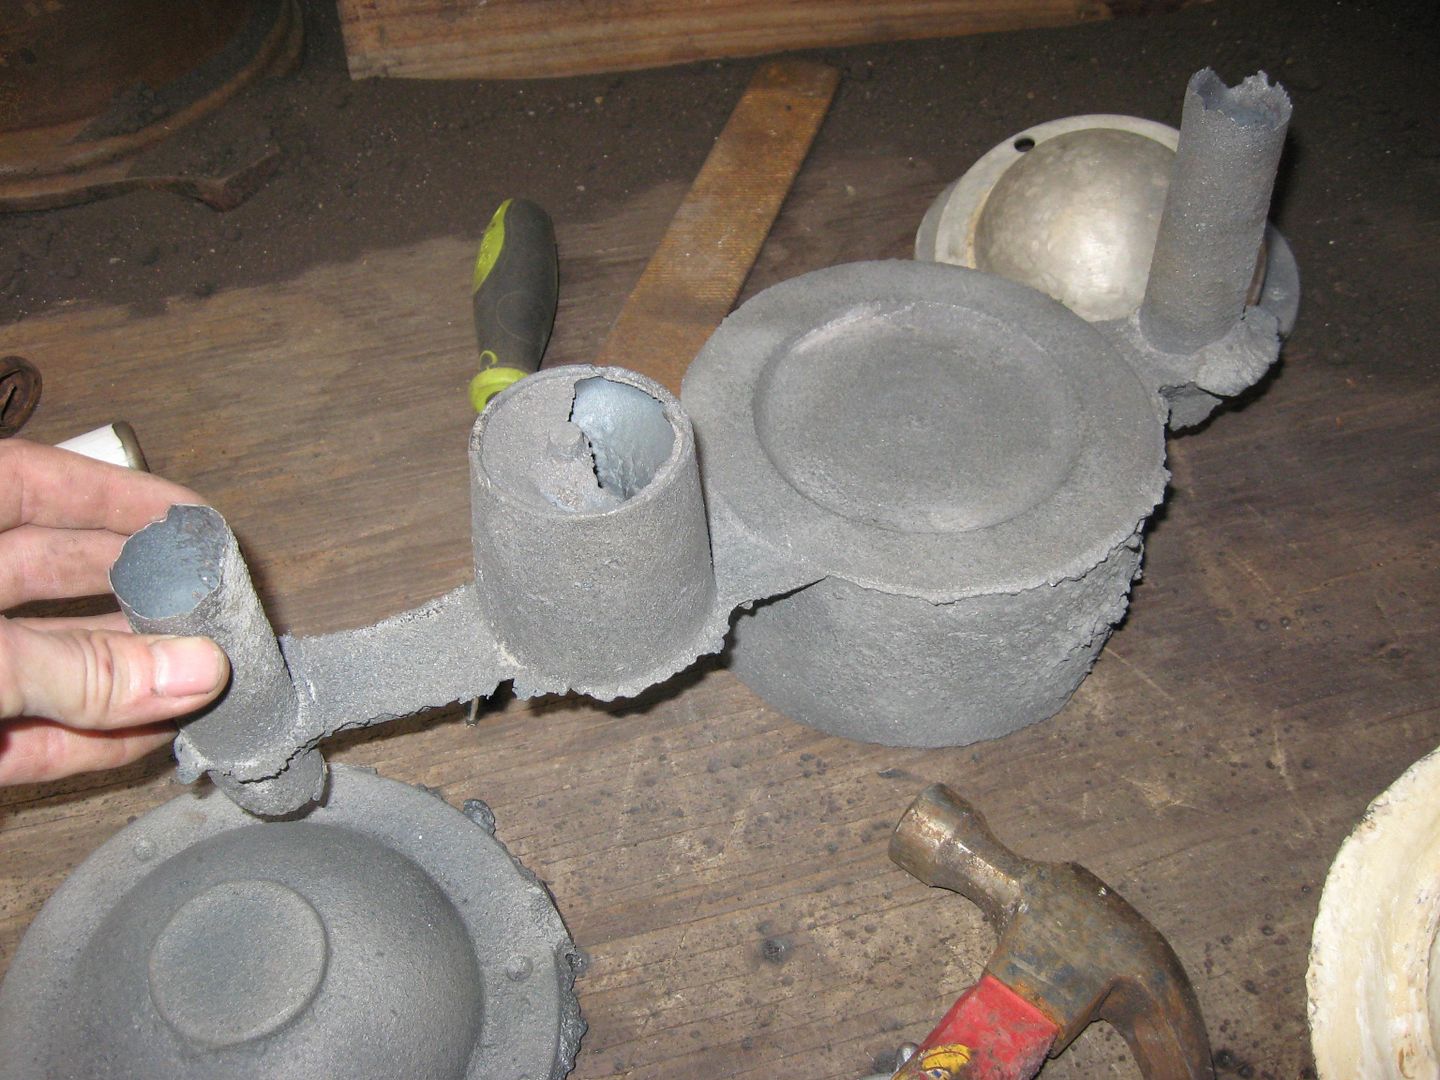
The pulley turned out great. No blow holes or shrinkage.
Justin
On your nut, if I may suggest, you need a feeder to prevent the shrinkage. I would put one in that is the same size or larger than the actual part. I always make sure the feeder is taller than the part being fed. Have had great luck with that. See below a part that I cast and see the amount of shrinkage I had in the feeder.


The pulley turned out great. No blow holes or shrinkage.
Justin
Re: Cincinnati Shaper
If thats a pulley save yourself some work and put a core in it so you don't have to drill all the way thru it,
The problem that I had yesterday other then all the other things, was I didn't stick a vent in the top of the mold over the Hex part, it actually would of if I had of made the core so it was taller then the part and vented it like I should of out the end. OOOOH well its just propane and money, but I think I have the oil problem on the burner straightened out, found a piece of some bug shell in the tip of the nozzle, so now its time to fire it back up quick as I get the top of the muller cleaned off so I can ram up some sand. also have to make a longer core box (3.250 long hunk of PVC split down the side).
How much FeSi are you using in your pours, are you measuring it or just grabbing some and tossing it in.
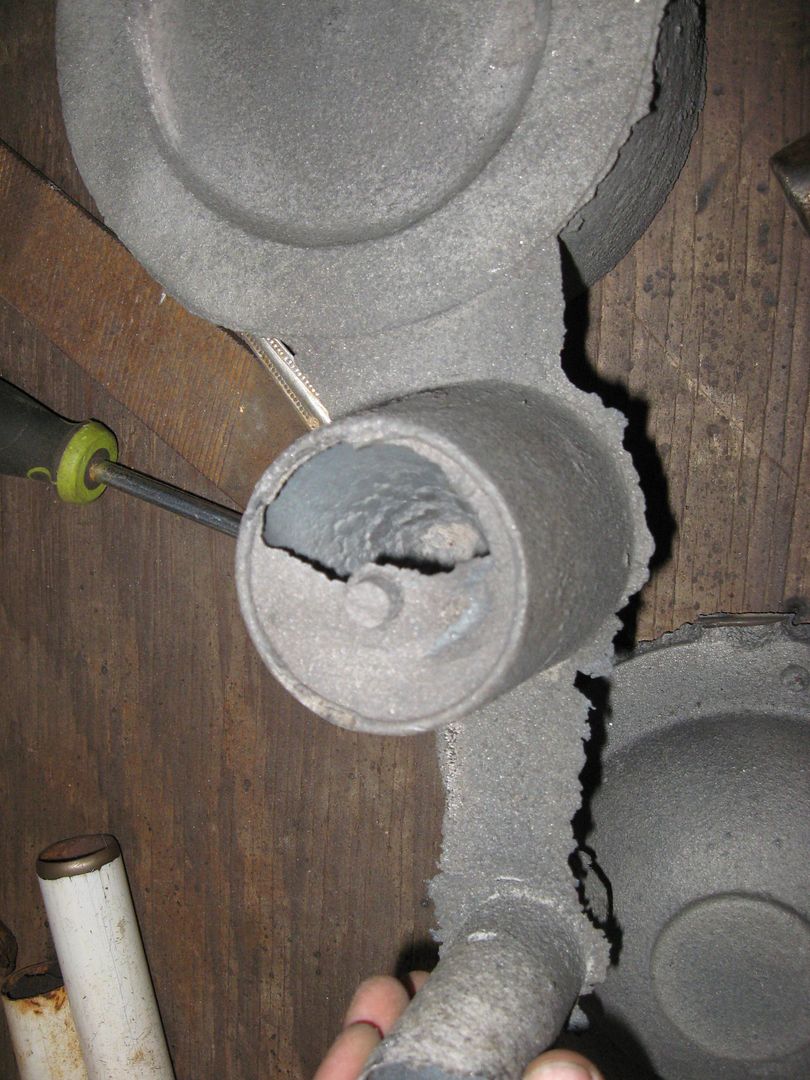
heres a shot down the exhaust hole and no rabbits came out either.
The problem that I had yesterday other then all the other things, was I didn't stick a vent in the top of the mold over the Hex part, it actually would of if I had of made the core so it was taller then the part and vented it like I should of out the end. OOOOH well its just propane and money, but I think I have the oil problem on the burner straightened out, found a piece of some bug shell in the tip of the nozzle, so now its time to fire it back up quick as I get the top of the muller cleaned off so I can ram up some sand. also have to make a longer core box (3.250 long hunk of PVC split down the side).
How much FeSi are you using in your pours, are you measuring it or just grabbing some and tossing it in.
heres a shot down the exhaust hole and no rabbits came out either.
David and Charlie aka the shop monster
If life seems normal your not going fast enough" Mario Andrette
If life seems normal your not going fast enough" Mario Andrette
Re: Cincinnati Shaper
On this pulley it only had a 1" shaft, and it does not take that long to bore the hole on the lathe. I also have reamers that really make short work of finishing the bore. I also only needed one of this pulley to fill the order so I just cast it solid. I also avoid cores because if it is not perfectly centered, you can have a tough time of truing the bore back up. I have a worn out lathe so chatter is something I avoid as much as possible.
I saw in the first picture of your cast iron knob that the break was somewhat silvery (chilled) I have been adding .112 ounces of silicon per pound of metal. For thicker castings you can add less and for thinner castings you can add more. On this knob, I would add about .112 ounces per pound of iron. Be sure you mix the silicon in after you add it. It tends to sit on top of the melt and can turn to slag. I stir it in with a 3/8" piece of rebar and if the rebar melts to a point, I know it is hot enough to pour. If ANY of the iron sticks it is too cold to pour.
Looking forward to the next pour results!
Justin
Re: Cincinnati Shaper
thanks for the info on the silicon, do you end up with what looks like white sand in your crucible after melting iron and using the FeSi?
The core I put in this part I'm not to worried about it if its a little off center as the part gets a 1 inch hole thats threaded in it. That runner on the first batch that i poured did have some white iron in it but for the most part the iron in the actual casting machined great it was just as full of holes as a swiss cheese.
hoping to pour tomorrow, will have to wait to see what tomorrow brings thou.
DA.
David and Charlie aka the shop monster
If life seems normal your not going fast enough" Mario Andrette
If life seems normal your not going fast enough" Mario Andrette
Re: Cincinnati Shaper
got a little more done before the neighbor came over with a little job he needed done.
first up the shop monster said he was on strike till the eats around here improved, I told him to go ahead and strike.

Then we did a little gluing, I may of put on a little too much weight but I wanted to be sure the glue stuck
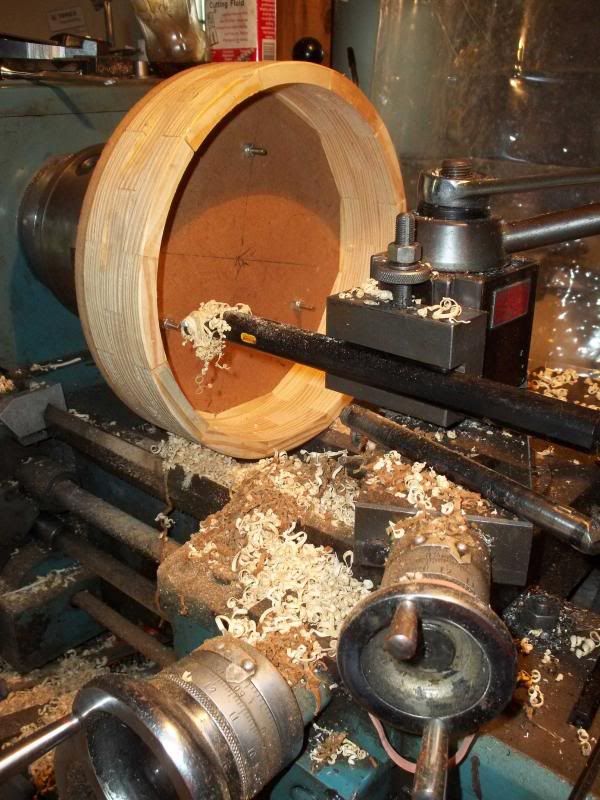
Started turning the outside, its either the antique MDF or the Southern Yellow Pine not sure which one but one of em was so hard I had to use tap magic for cutting fluid.
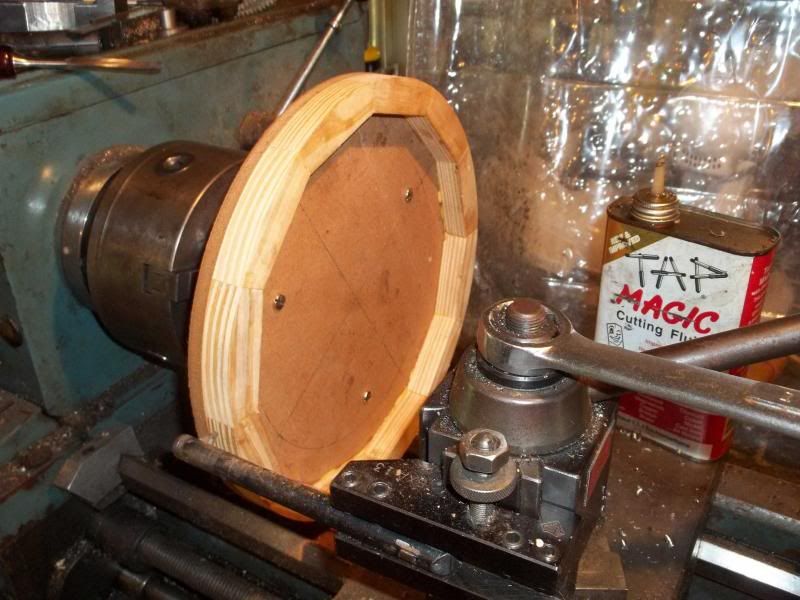
Inside turned a lot better, but I think it was because of the CG insert that was in the bar.
Anyway this part is in need of a hub and some gussets now and a lot of wax fillet now, gluing the other half to the MDF as I type.
DA
first up the shop monster said he was on strike till the eats around here improved, I told him to go ahead and strike.

Then we did a little gluing, I may of put on a little too much weight but I wanted to be sure the glue stuck

Started turning the outside, its either the antique MDF or the Southern Yellow Pine not sure which one but one of em was so hard I had to use tap magic for cutting fluid.

Inside turned a lot better, but I think it was because of the CG insert that was in the bar.

Anyway this part is in need of a hub and some gussets now and a lot of wax fillet now, gluing the other half to the MDF as I type.
DA
David and Charlie aka the shop monster
If life seems normal your not going fast enough" Mario Andrette
If life seems normal your not going fast enough" Mario Andrette
Re: Cincinnati Shaper
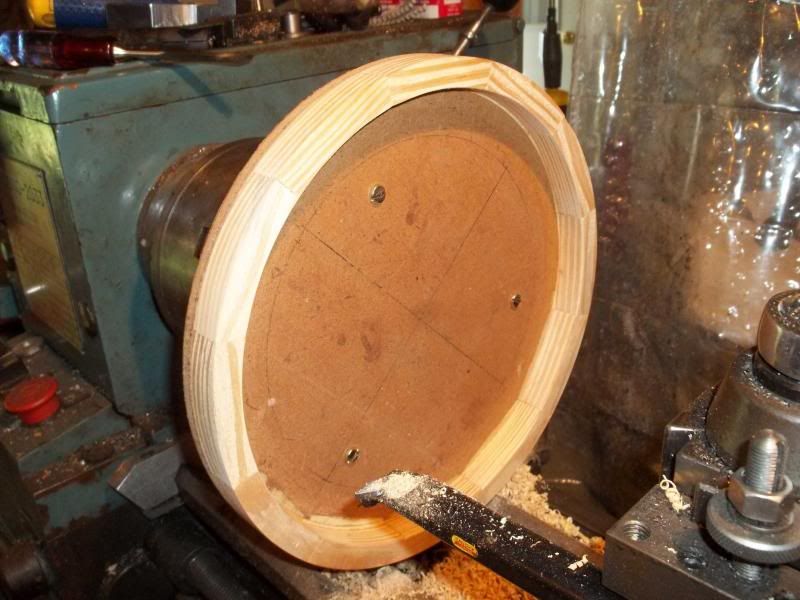
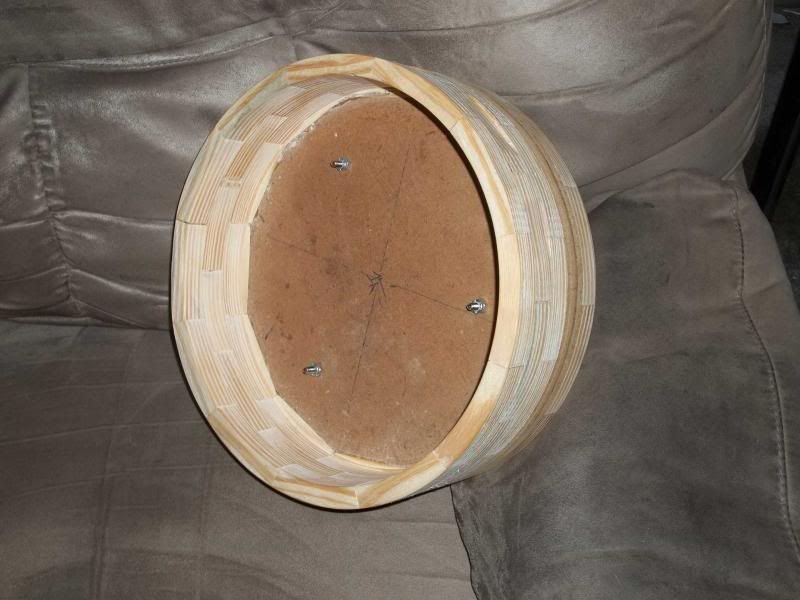
anyway here is where I stopped at for the day
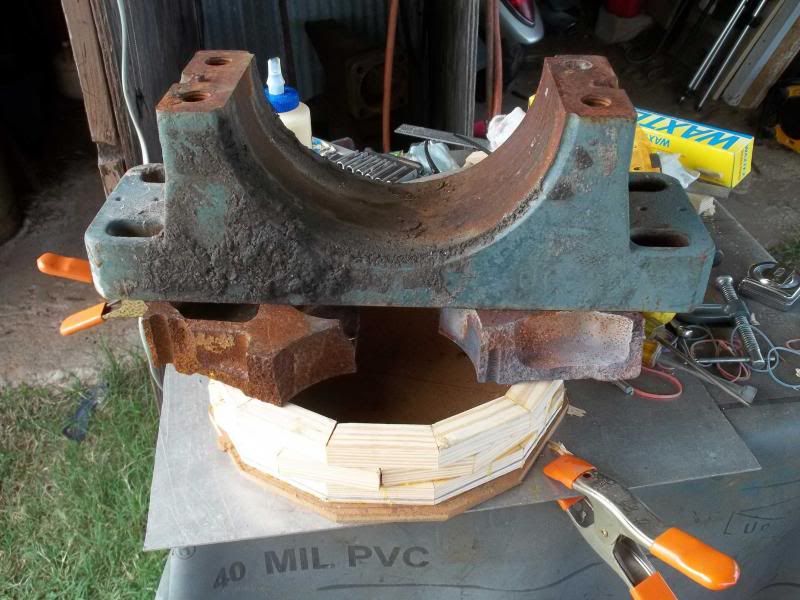
we did some more gluing had to have a bigger weight for this stack so I dug around in the back of my truck and found the bottom half of a bearing housing I had been hauling around. they make great material for the furnace.
and so it would clear the bed on the back side I turned it around so it was over the chuck and did the outside first
on the lathe after I had turned it back around so I could to the inside.
the two halves bolted together, the MDF that I used is a little thick but I think I can face it off in the mill after I figure out what all else I need to stick on it.
Anyway so far it didn't come apart and try to brain me or anything so I count today as a good one.
DA
we did some more gluing had to have a bigger weight for this stack so I dug around in the back of my truck and found the bottom half of a bearing housing I had been hauling around. they make great material for the furnace.

and so it would clear the bed on the back side I turned it around so it was over the chuck and did the outside first

on the lathe after I had turned it back around so I could to the inside.

the two halves bolted together, the MDF that I used is a little thick but I think I can face it off in the mill after I figure out what all else I need to stick on it.
Anyway so far it didn't come apart and try to brain me or anything so I count today as a good one.

DA
David and Charlie aka the shop monster
If life seems normal your not going fast enough" Mario Andrette
If life seems normal your not going fast enough" Mario Andrette
Re: Cincinnati Shaper
I've got a problem here with split line, where the pattern is going to split at, I had intended to use 1/4" plywood which would of gave me a half inch thick web in the pulley that I am hoping to make from all this wood butchering, but I didn't have any. But my neighbor came up with a hunk of 3/8 inch MDF which I used, but it makes the web three quarters of and inch thick now.
So the problem is how do I thin this down, plop it down on the mill and take some off of each half, or spin it up in the lathe and turn it off, if I go the lathe route I can cut a slight radius in the corner but it won't be enough to really make a difference. Guess I'll just have to keep on gluing more parts onto it and see which way we go in the end.
Its looking a little thick right now but remember the rim the belt runs on will have to have draft so it will pull out of the sand, and it needs to be thick enough to machine the crown on it after its casted.
DA
David and Charlie aka the shop monster
If life seems normal your not going fast enough" Mario Andrette
If life seems normal your not going fast enough" Mario Andrette
Re: Cincinnati Shaper
Looking good Dave, this is a very interesting project, do you have much work for the shaper once its finished . The shop monster sure looks comfy while on strike 
Sorry I cannot help on the above problem Dave
Mike
Sorry I cannot help on the above problem Dave
Mike
When life gets tough, remember: You were the strongest sperm 
-
latzanimal
- Posts: 418
- Joined: Wed Jun 01, 2011 10:58 pm
Re: Cincinnati Shaper
Thanks Dave. Actually the top one is wenge with maple stripes and the bottom is bubinga.dallen wrote:Latz
Nice shell the one laying on top is walnut, the bottom looks like cherry but I don't think it is. anyway nice work.
you ever cast that brass drum that you were after, I take it that you got that big monarch wired and working or you still using it for a door stop?
Finally found someone on AA that seems to think he can cast it without a problem. I need to get a pattern made. Time is something I severely lack. Between real work and extra side jobs, I haven't had time to wipe my nose. So the Monarch is still a door stop.....
Just trying to help as it was something I am very familiar with. Most of the stuff on here I have no experience with. For once I felt like I could help.....
Anyway, when I get the other pattern made, are you still up for casting me a couple of counter weights for my stands from cast iron?