Cincinnati Shaper

All About Showing Off, This is why we do what we do.
mite5255
Posts: 1747
Joined: Thu Jun 02, 2011 1:11 am
Location: Caboolture Qld Australia

Re: Cincinnati Shaper

Post by mite5255 »

would taking the gusseting out and making a triangle core mold work.
Good old Frank's on the way and he always has great ideas :D :D

Mike
When life gets tough, remember: You were the strongest sperm :)
F.C.
Posts: 560
Joined: Sat Jun 04, 2011 10:28 am

Re: Cincinnati Shaper

Post by F.C. »

What will help in keeping that sand from tearing out is two or three techniques. First, and will help improve a lot, is to determine how much sand you need to "face" your pattern during the initial pack effort. Basically the first three inches of loose sand at most. Then mix 5% by volume of sand, corn flour to that mix. Mix it well, then let set overnight. The corn flour will absorb "some" of that oil and will work like a very light glue to help the sand grains stick together. The corn flour will bake off quicker than the oil will and will not hurt your batch of sand. Use your regular sand mix to pack the rest of the pattern and back half of the mold.

The other trick is to utilize wire mesh to act as rebar in the sand. I have included a photo below of a sketch I drew to illustrate this technique. The wire mesh needn't be heavy duty. Light duty is fine, just don't use nylon or it'll burn in the sand. Or, you can use clips of coat hangar wire and spread them at random where you've experienced large blocks of sand coming loose when you've lifted the pattern out.

Another trick for ease and assistance of lift is to first polish your pattern with graphite powder. Then use a light dusting of talc before you apply the face sand.

Another trick for ease of lifting the pattern and backboard evenly is to drill four small holes through the backboard that will allow for insertion of a 16 penny framing nail. When the pattern is packed and flipped, before removing the backboard, insert a nail through each hole and press to it's head. Then rap the pattern sufficiently to ensure even vibrations have been spread across the pattern then lift the board off as even as you can do by hand and eye. The nails into the sand will act as guide pins and help resist any side to side and uneven lift.

For patterns that seem tempermental at that first "let go of the sand" I've added another trick I use to get the pattern to lift and separate from the pattern face within the first hint of release of the pattern board from the sand. It involves use of a direct overhead support device with a turnbuckle and shoe string tethered together and connected to the pattern board direct center at a screw eye inserted into the back of the board. After rapping the back of the pattern board, turn the buckle a full turn, rap lightly around the board once again. Turn the buckle another turn and rap even lighter again. Do this till you see the slack taken out of the sting's stretch and you know full well the weight of the board has lifted off the sand (even though it may appear, by eye, to be still connected). Look closely till you assure it's at least 1/32" clear then lift the pattern yourself, by hand, off allowing the nail guides to maintain lateral resistance. Or... you can keep turning the buckle till the pattern clears the sand and keep turning till the buckle has reached it's effect. Then lift the pattern clear by hand. Just don't keep rapping the pattern after the pattern actually clears the sand or you'll cause the pattern to lightly shift down on one corner then the next causing facial blemishes in the sand's texture. Might even cause a fracture in a delicate piece of mold sand that could come loose during the pour.

Anyway... give it a thought and see what you think about the suggestions I've made. I've done some large pieces like this before where it was impossible for two people to perform a direct lift evenly by hand. I'm talking 48" diameter pattern that was high relief carving, 1/4" high lettering, and a LOT of detail. I've used this technique twice with 100% success. I've also used the nails through the backboard trick hundreds of times and swear by the benefit.
Attachments
100_4165.JPG
100_4162.JPG
dallen
Posts: 2321
Joined: Sat Jun 04, 2011 9:06 am
Location: Oklahoma

Re: Cincinnati Shaper

Post by dallen »

FC thanks I'll have to wait till I try ramming it up again to try any of the tricks you suggest. the wire mesh would probably be pretty hard to do with relation to where it would have to be places 4 inch drywall screws would be a big help (i used them before in stubborn places) to hold the hunks in place.

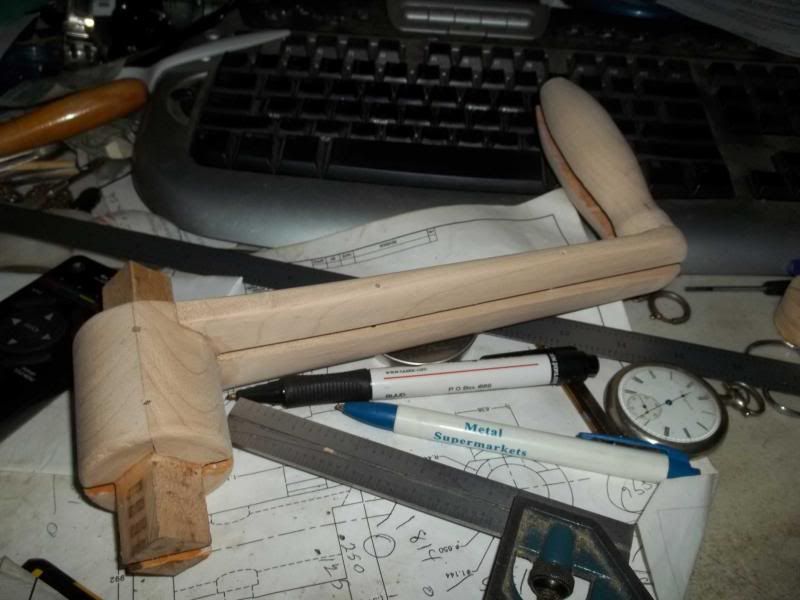
anyway I pretty well got over my being PO'ed at it by making a hand crank pattern, its not pretty but then neither am I. but I need one for the shaper.
Image

I have a core box that has a little left to do on it, so I may get to pour it tomorrow.

You mentioned having to use two crucibles, I have already counted the possibility in and yes I have an A10 that will fit in my middle size furnace (have three furnaces) so that is covered, I'm hoping to do this with one A20 full of aluminum.

I have some newer sand that hasn't been used hardly, may have to drag out a bucket of it for facing or just mix some new,

Well I gotta look up a plate vibrator see if I can make one. don't really have any way to vibrate the plate so back to the books.

DA
David and Charlie aka the shop monster

If life seems normal your not going fast enough" Mario Andrette
F.C.
Posts: 560
Joined: Sat Jun 04, 2011 10:28 am

Re: Cincinnati Shaper

Post by F.C. »

Go to the sex toy shop and get your wife a present. Some of them vibrators work great, not just on the Mrs. but serve well to vibrate patterns for ease of release. Make sure she's not around when she sees you using it out in the foundry. :lol: Clean it up real nice and put it back where she left it "EXACTLY" where it was AND in what position it was resting. Daym womens have remarkable memory for such things. Don't ask me how I know these things. :oops:
mite5255
Posts: 1747
Joined: Thu Jun 02, 2011 1:11 am
Location: Caboolture Qld Australia

Re: Cincinnati Shaper

Post by mite5255 »

I'm asking :lol: :lol: :lol: :lol: :lol: :lol: :lol: :lol: :lol:
When life gets tough, remember: You were the strongest sperm :)
dallen
Posts: 2321
Joined: Sat Jun 04, 2011 9:06 am
Location: Oklahoma

Re: Cincinnati Shaper

Post by dallen »

I think I'll stick with making one FC, that or just stick a rod in the drill with an off center slug on the end of it.
David and Charlie aka the shop monster

If life seems normal your not going fast enough" Mario Andrette
dallen
Posts: 2321
Joined: Sat Jun 04, 2011 9:06 am
Location: Oklahoma

Re: Cincinnati Shaper

Post by dallen »

been playing with the crank handle pattern, found out that I built a twist into it on the handle end, so need to cut it back apart and redo the joint so it will lay flat. otherwise its molds up a handle that fits the shaper its just not very good looking.

Image
David and Charlie aka the shop monster

If life seems normal your not going fast enough" Mario Andrette
User avatar
Jammer
Posts: 1581
Joined: Thu Jun 02, 2011 4:04 pm
Location: Ohio

Re: Cincinnati Shaper

Post by Jammer »

Handle looks pretty good to me. As long as it works, what the harm?
8-) 8-)
dallen
Posts: 2321
Joined: Sat Jun 04, 2011 9:06 am
Location: Oklahoma

Re: Cincinnati Shaper

Post by dallen »

I guess the answer to that is, would you buy one that looked like that. I'm wanting to pour it out of NiBrAl and I want it to look good not all filed down.

I had a slight problem with alignment between the hand grip and the rest of the pattern and didn't find it until I tried to mold the thing and it wouldn't lay flat. So as I type I am in the process of cutting it off and reglueing it so that the thing will lay flat and hopefully pull out of the sand without tearing the sand all to pieces like it did this morning.

But I am pretty happy with the design and all, the core worked even if it was a little out of whack from the core mold not filling in the corners, another thing I'm working on fixing tonight. I think that with the way that this fits the shafts that I may redo it so that it has a smaller square hole in it this one is a little loose on the shaft ends works nice on the vise thou.

Jammer hows work on the shop you getting anywhere with it.

DA
David and Charlie aka the shop monster

If life seems normal your not going fast enough" Mario Andrette
User avatar
Jammer
Posts: 1581
Joined: Thu Jun 02, 2011 4:04 pm
Location: Ohio

Re: Cincinnati Shaper

Post by Jammer »

Oh, I see Dave, your a perfectionist like me. :) My little OCD has kept me from doing a lot of things, never comes out good enough.

On the shop.... I'm waiting on the crew to arrive ANY MINUTE!!
8-) 8-)
Post Reply